

We recommend watching our Intro to the Monitor video!
Here's a downloadable PDF version of the instructions to print out.
Installation Support (phone, text or email): 1-833-442-7776 | prosupport@haveniaq.com
In this article:
- Device & Installation Overview
- Duct Placement
- Wiring & Power
- Wireless Configuration
- Completing the Installation
Device & Installation Overview
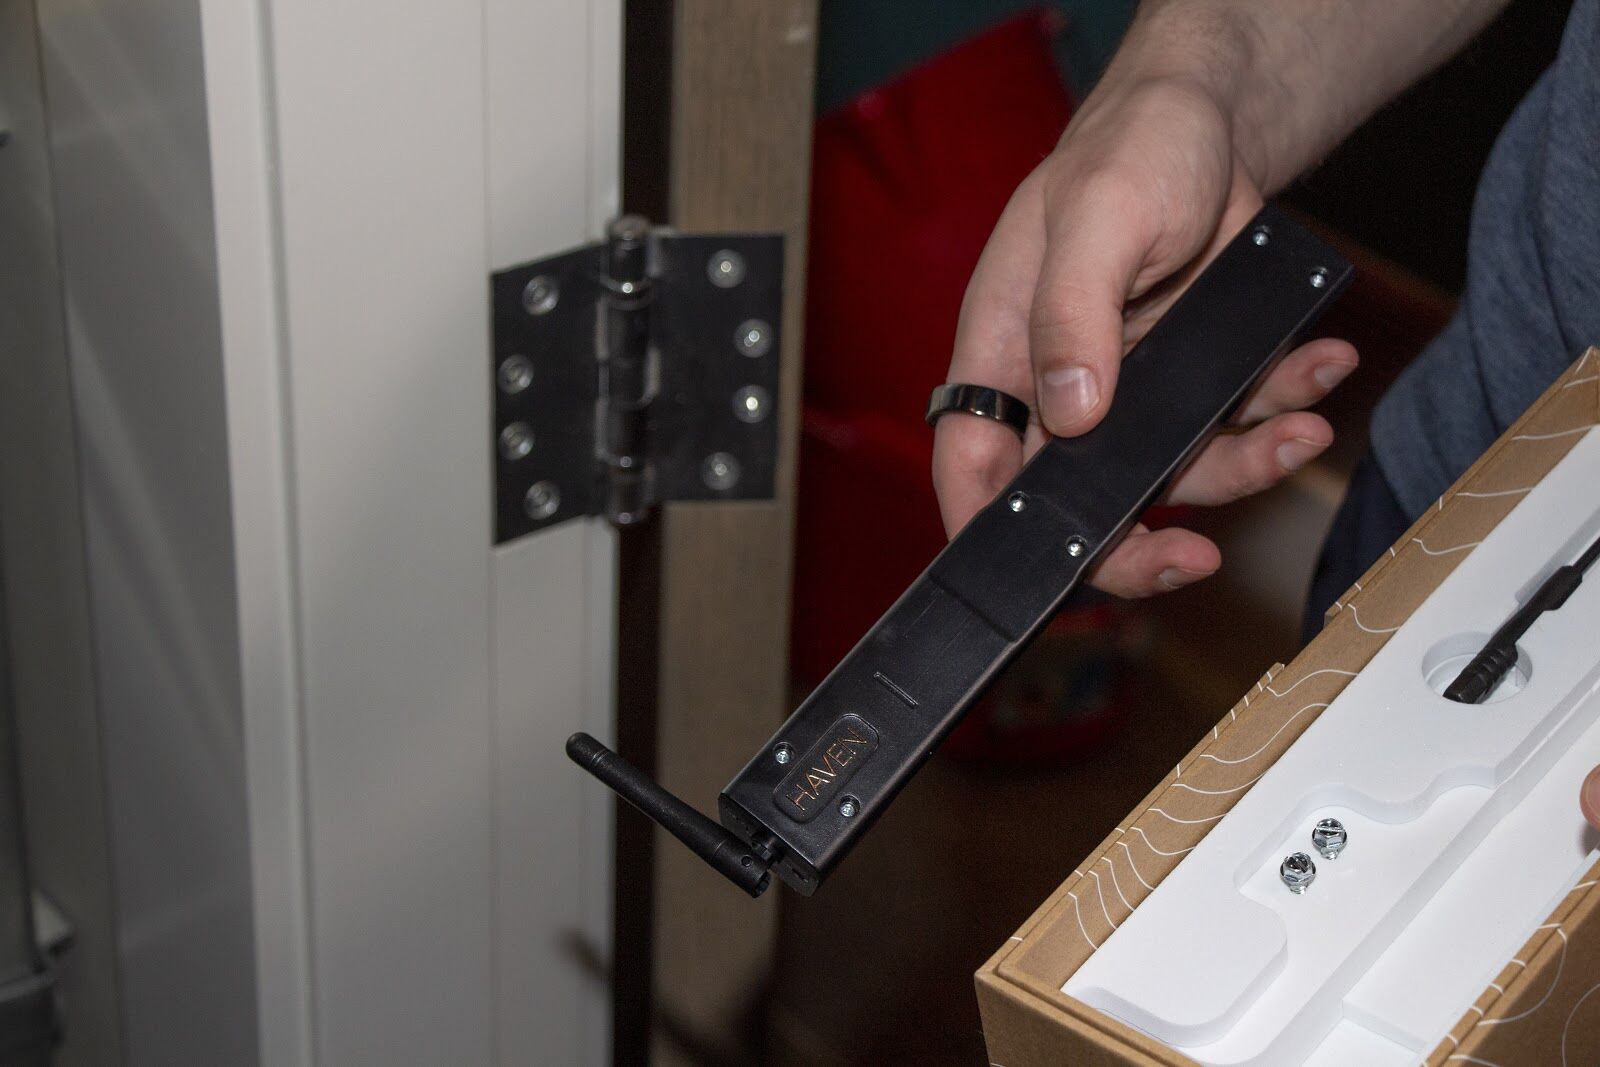
Here's a quick video to walk you through installing a HAVEN Central Air Monitor.
We recommend all HAVEN Pros watch this video before attempting their first installs.
PLEASE NOTE!
Any app interfaces throughout instructions may vary from what is currently live! We're constantly updating it to improve your experience.
Prerequisites
-
Ducted central air system
-
Monitor is suitable for any duct that has minimum depth/diameter of 8"
-
Round or rectangular, rigid, flex or ductboard
-
-
Within the range of WiFi
-
802.11 b/g/n
-
WPA or Open
-
- Android or iOS phone with HAVEN IAQ app downloaded and Bluetooth enabled
Parts INCLUDED
-
HAVEN Central Air Monitor
-
Mounting plate (you may have the OG one or our V2 rotating mounting plate)
- Alignment plate
-
Gaskets x2
-
Screws x2
-
Wago splicing connectors x2
Parts NEEDED (not included)
- ~12ft of 2 wire cable (18-24 gauge)
- Optional - 24VAC wall plug
Tools NEEDED
-
Drill
-
Hole saw (1 ½” for rectangular ducts, 2” for round ducts)
-
1/4” hex driver
-
Wire strippers
Recommended tools
- Psychrometer
Optional tools
- Non-contact voltage testing tool
Duct Placement
Just one thing before we kick off the installation: Do NOT secure the faceplate to the duct until the angle validation step is completed in the HAVEN IAQ app. This step is critical for finding the most reliable airflow signal. You'll thank us for eliminating any extra work, and your customer's ductwork will remain in good condition.
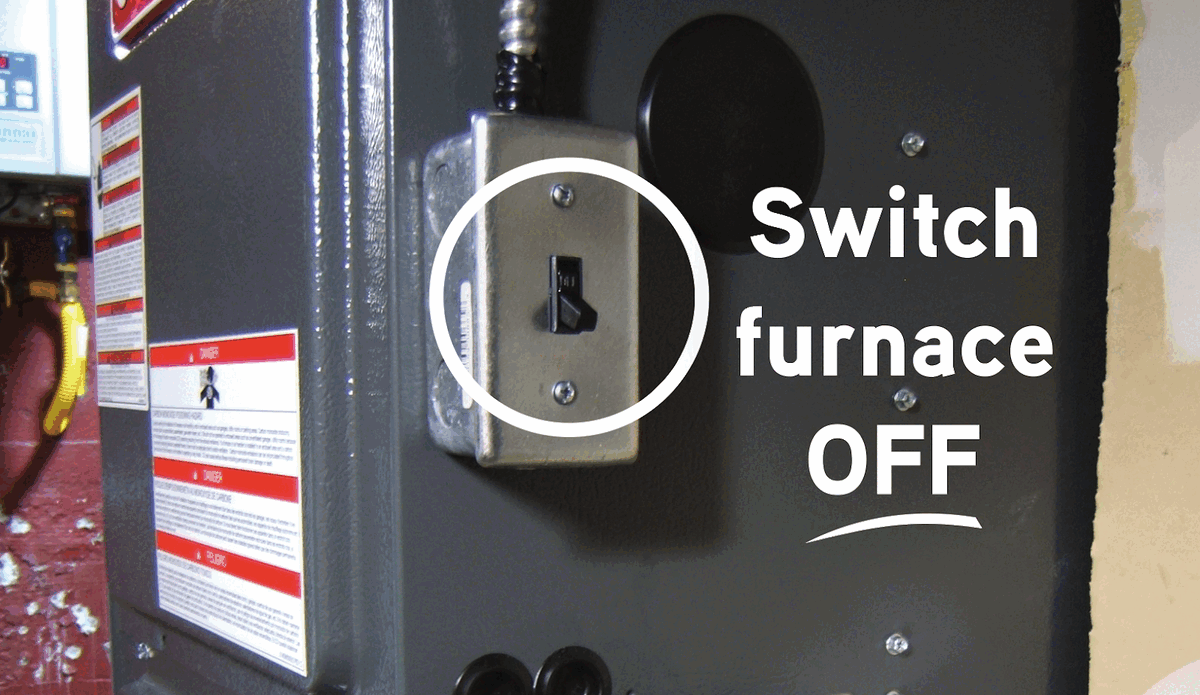
1. Turn off the furnace power.
Do not proceed unless this is complete.
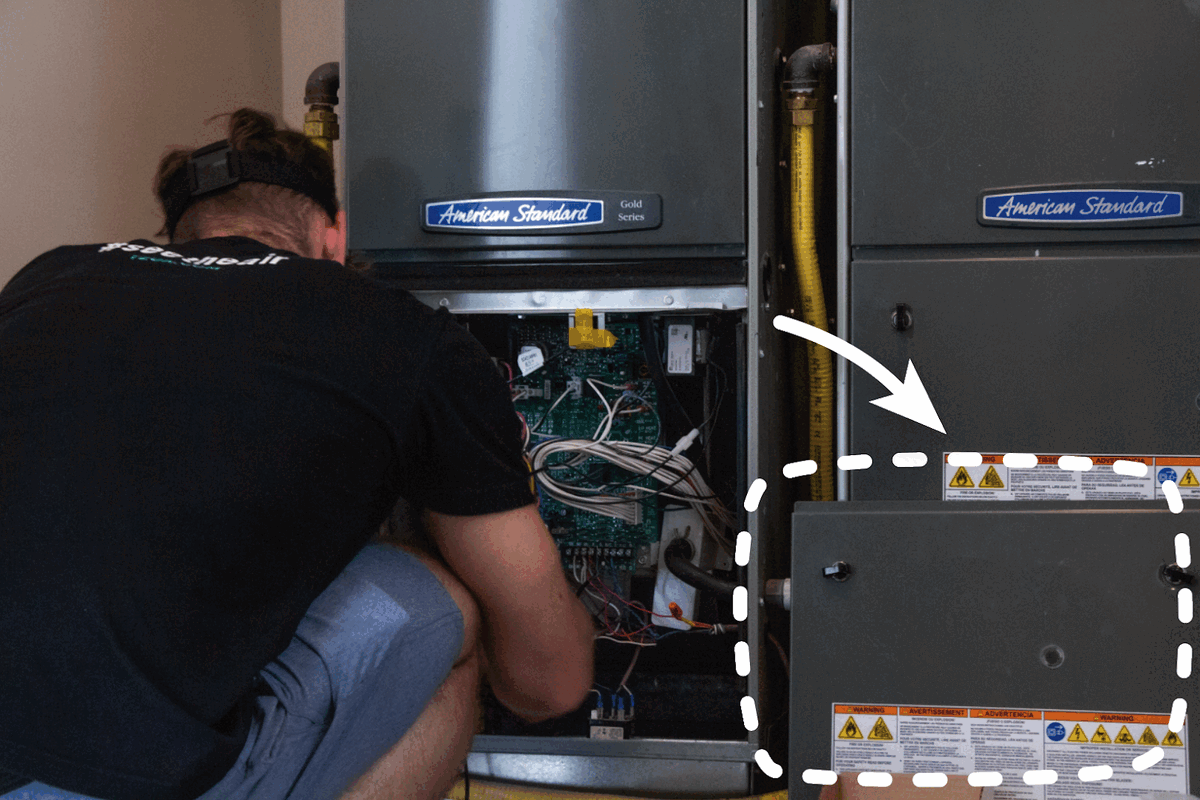
2. Open the furnace door to reveal the furnace control board.
3. Determine the optimal Central Air Monitor location.
What to look for
The Central Air Monitor is designed to be installed on both round and rectangular ducts that are a minimum of 8” in diameter. The optimal location is 2ft upstream of the furnace filter in a straight section of the RETURN duct to avoid air turbulence. If possible, also avoid installing within 24” of duct bends or other obstructions.
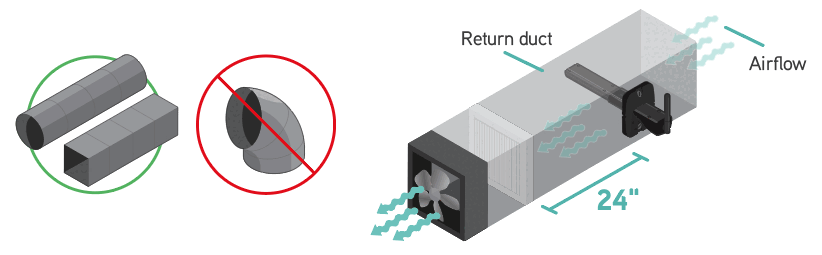
Airflow in the duct
The Central Air Monitor needs to be installed so that the probe is perpendicular to the airflow (see image below); this will ensure that the device is able to accurately measure airborne particles and chemicals. The HAVEN IAQ app allows you to optimize the exact angle at which it’s installed. This helps increase the stability of the airflow signal and maximize the airflow speed through the probe’s air channels.
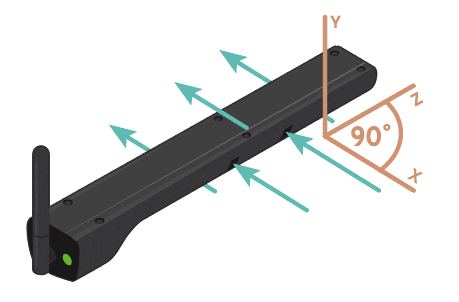
The Central Air Monitor requires a minimum airflow velocity of 0.4 m/s or 80 fpm to accurately report data. We recommend confirming this level of airflow while the air handler is running on the lowest speed with an anemometer prior to installing the probe.
Within WiFi range
Use a WiFi-enabled device like your phone to make sure that the proposed mounting location is within range of the home’s WiFi network. Open the WiFi settings on your device to ensure it shows up on the list of detectable networks.
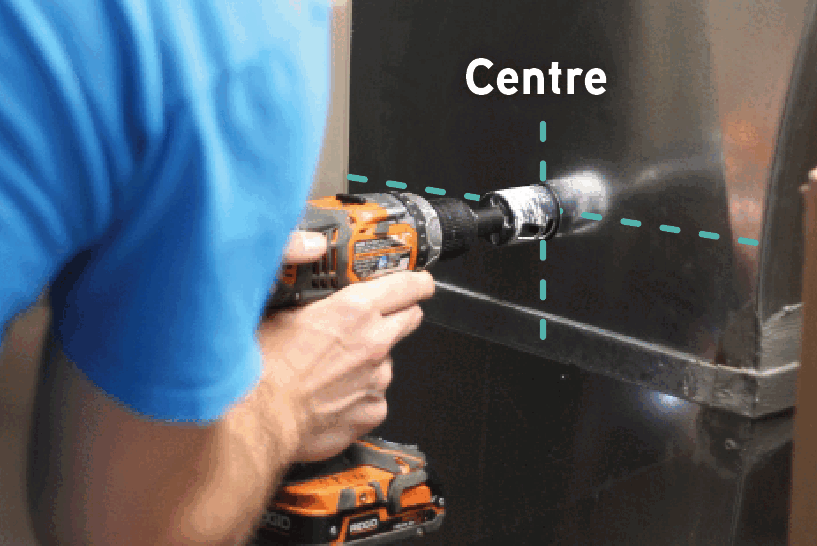
4. Mark the location & drill a hole in the center of the duct.
For rectangular ducts: use a 1 ½” hole saw
For round ducts: use a 2” hole saw
Wiring & Power
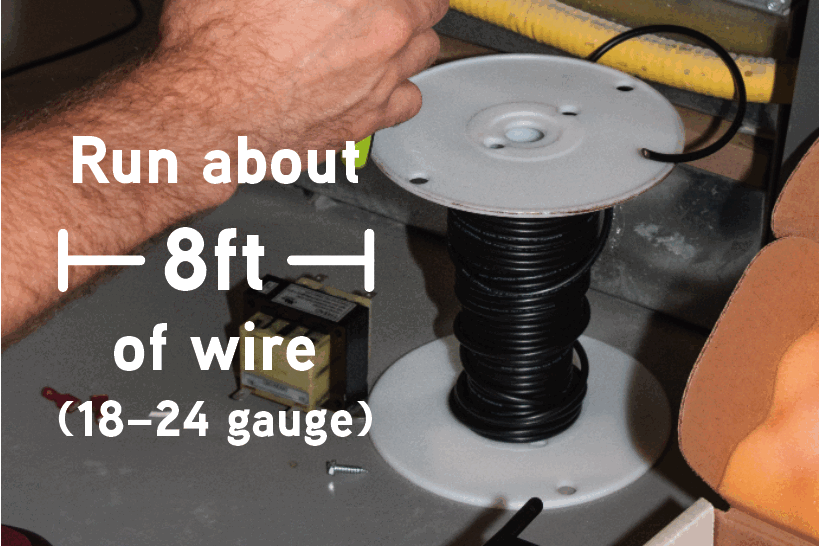
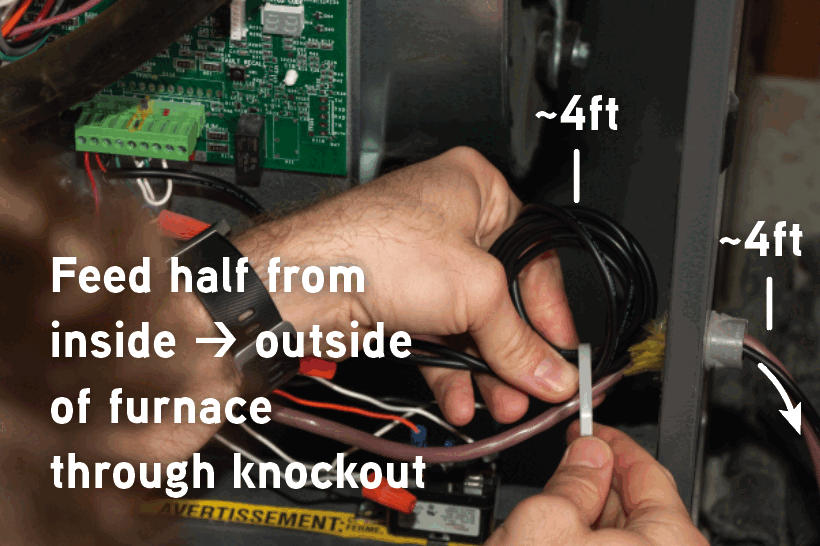
1. Run a length of wire (18-24 gauge) from the inside of the furnace to the outside where the Central Air Monitor will be installed. Leave some slack for any future maintenance.
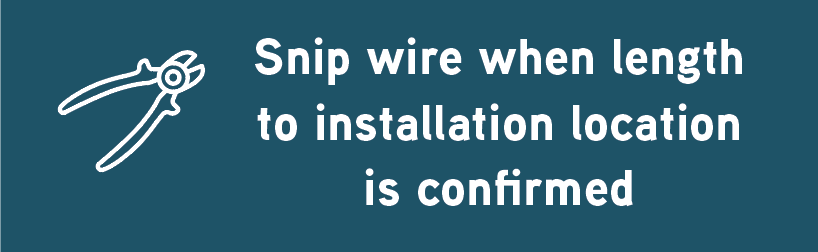
We recommend using solid core wire. Use a knockout that allows the cable to stay put even when the furnace door is closed. Leave another 4ft of length before snipping the cable to ensure that it reaches the desired Central Air Monitor location in the duct.
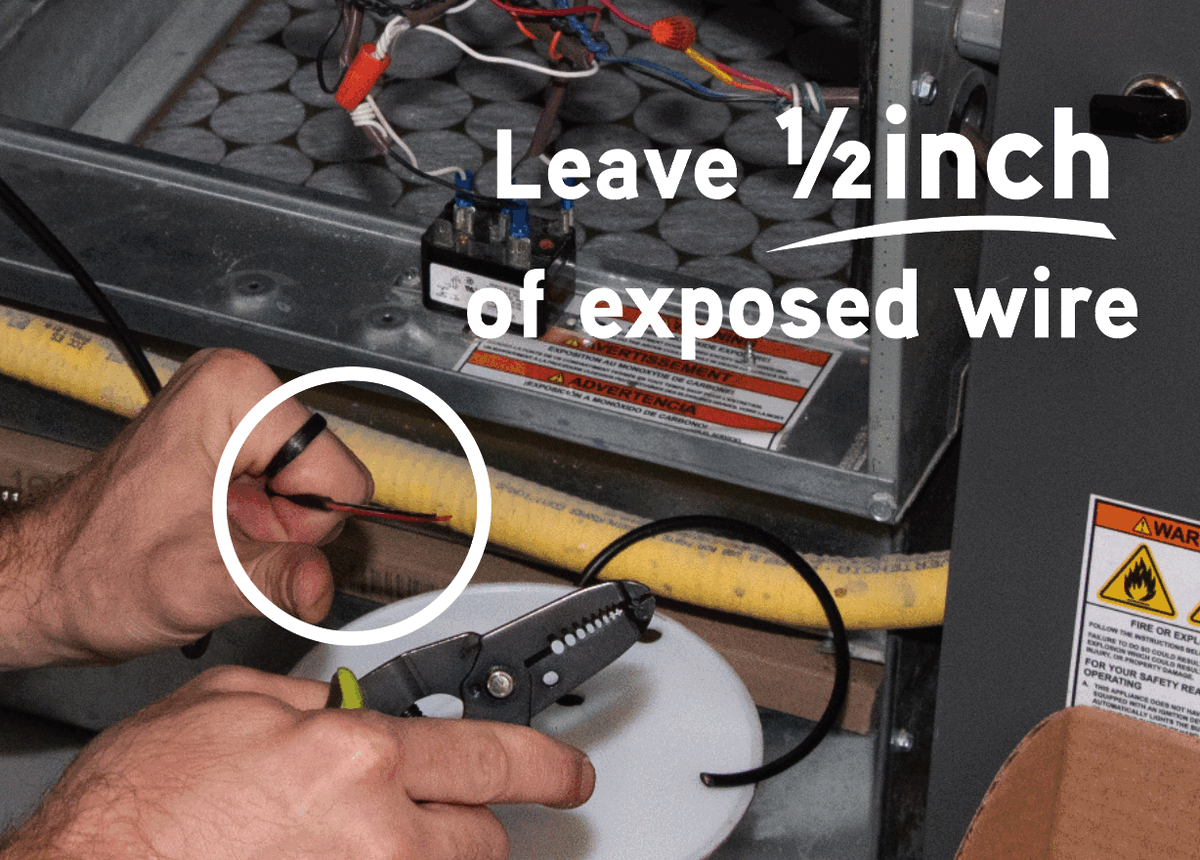
2. Using wire strippers, strip the jacket off both ends of the cable.
Make sure to leave ½” of exposed conductor on each wire.
3. Connect the Central Air Monitor to power.
There are multiple methods to connect the Central Air Monitor to power. It is advised to use a non-contact voltage testing tool to confirm that the power is not live before modifying furnace wiring.
Method 1: Furnace Transformer (recommended)
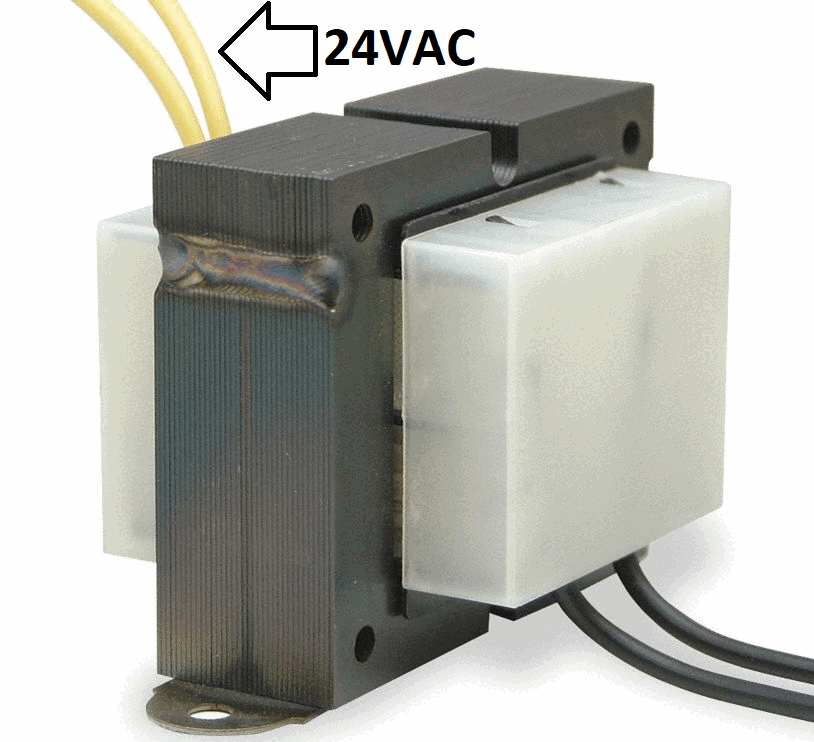
Find the 24VAC lines (these are usually yellow). Using wire strippers, strip the jacket off the wires, leaving ½” of exposed conductor on both ends of the cable. Using an inline, twist on, push on, or splicing connectors, connect the two ends of the new cable to the dedicated transformer.
Method 2: Furnace Control Board
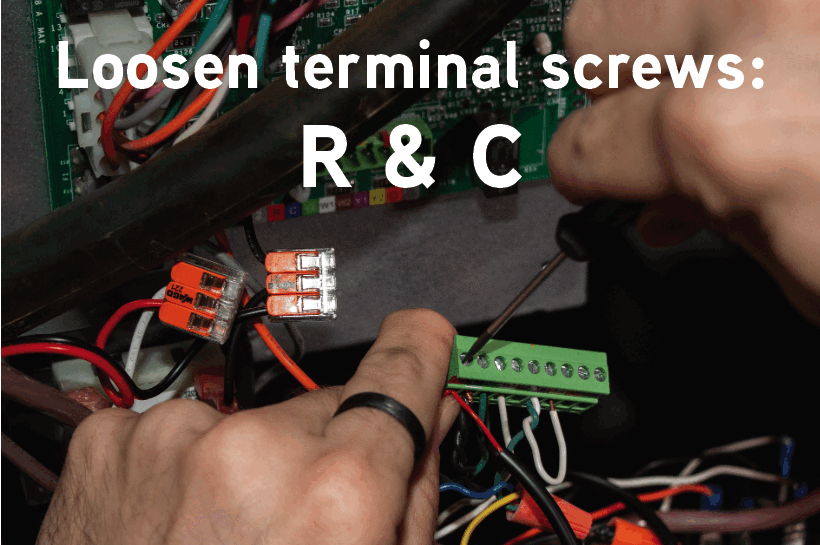
Inside the furnace, loosen the terminal screws of the “R” and the “C” terminals. Insert one wire into the “C” terminal and the other one into the “R” terminal. Tighten the screws securely.
Method 3: External Transformer
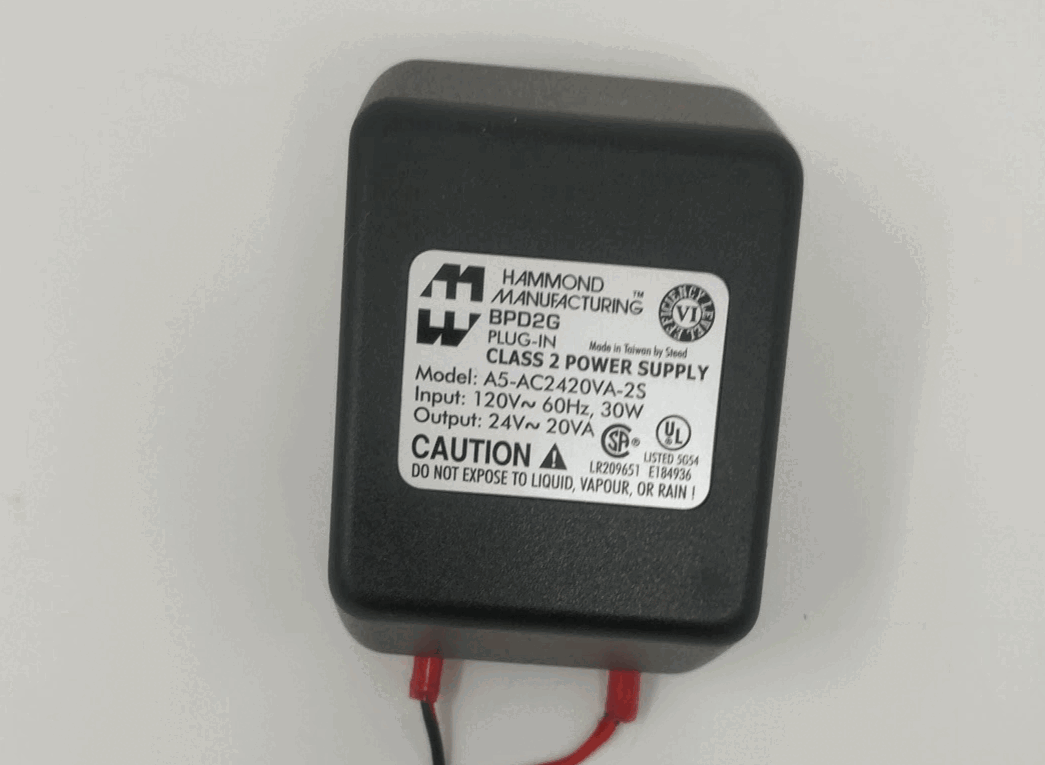
You may want to power the Central Air Monitor a wall outlet. If so, we recommend using a 24VAC wall plug as shown in the photo. As with the previous methods, it does not matter which terminal each wire is connected to.
Note: To avoid shorting the other side of the wires, avoid plugging this into the wall until STEP 9 is complete.
4. Close the furnace door & secure any screws.
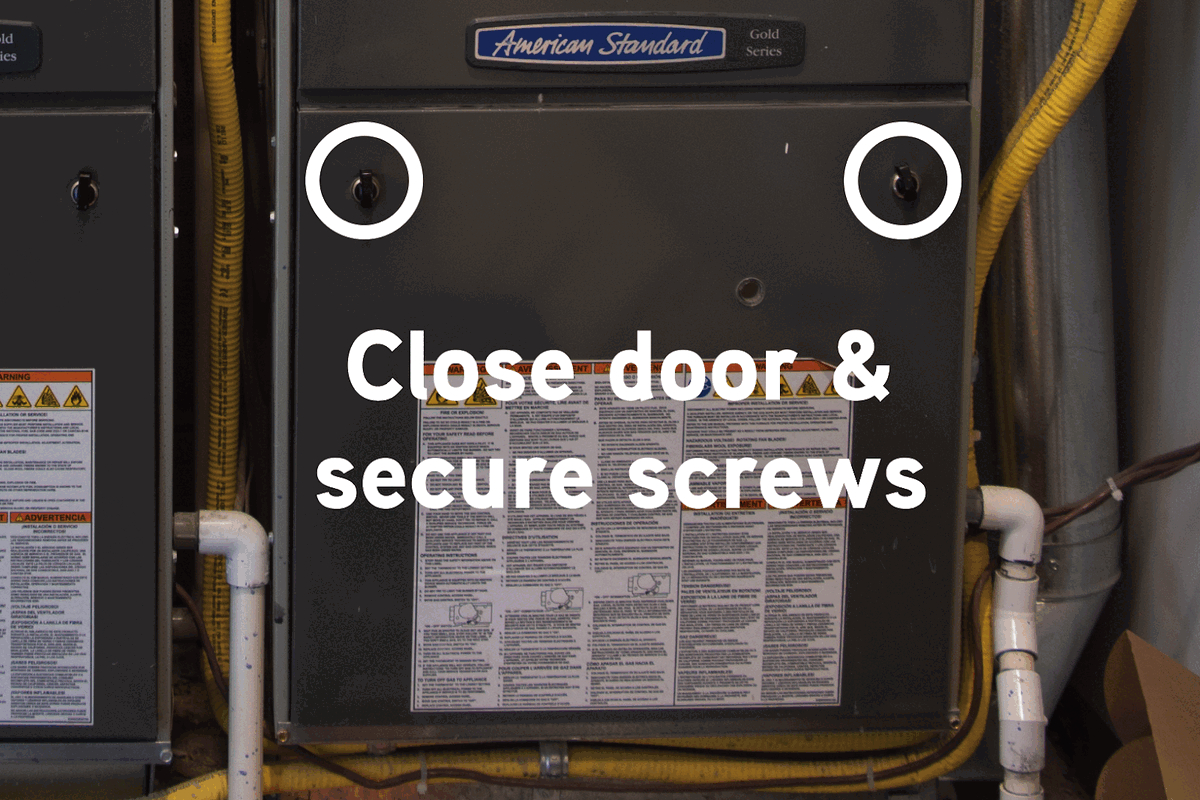
5. Connect the Central Air Monitor.
- Connect the other end of the cable to the Central Air Monitor’s terminals.
- Polarity doesn’t make a difference, secure wires either way.
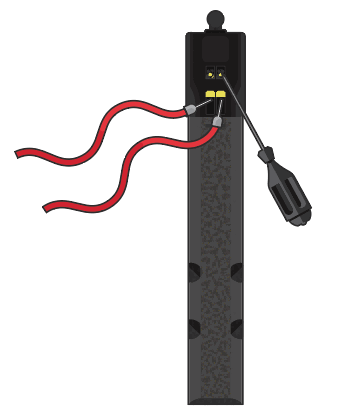
6. Turn the furnace back on using the master switch or circuit breaker.
The Central Air Monitor’s LED light should turn solid blue.
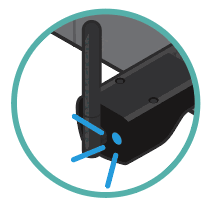
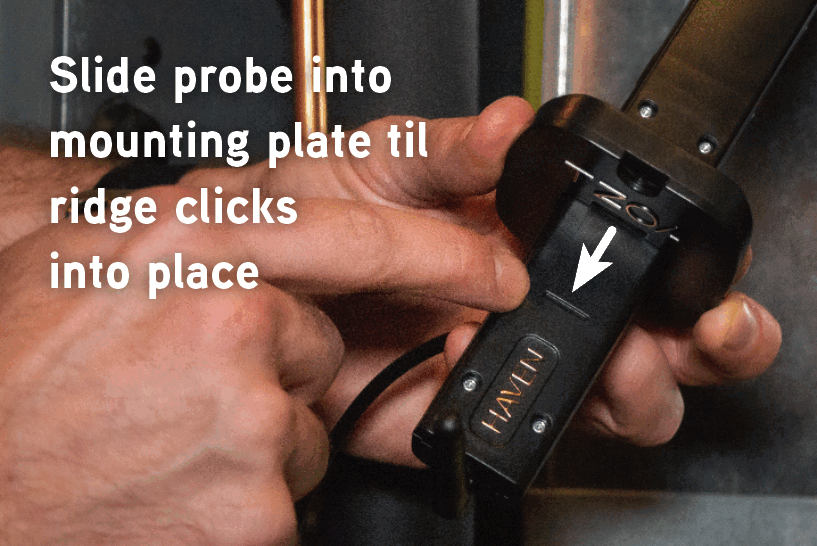
After the LED light turns blue, slide the probe through the mounting plate until it clicks into place. You'll feel a small but noticeable click, engaging the mounting plate interlock.
*PLEASE NOTE:
If the probe doesn't click into the mounting plate, the device installation will not complete. Once connected to WiFi, the LED will flash purple and green, indicating the probe is not clicked in properly.
Commissioning the Central Air Monitor with the HAVEN IAQ App
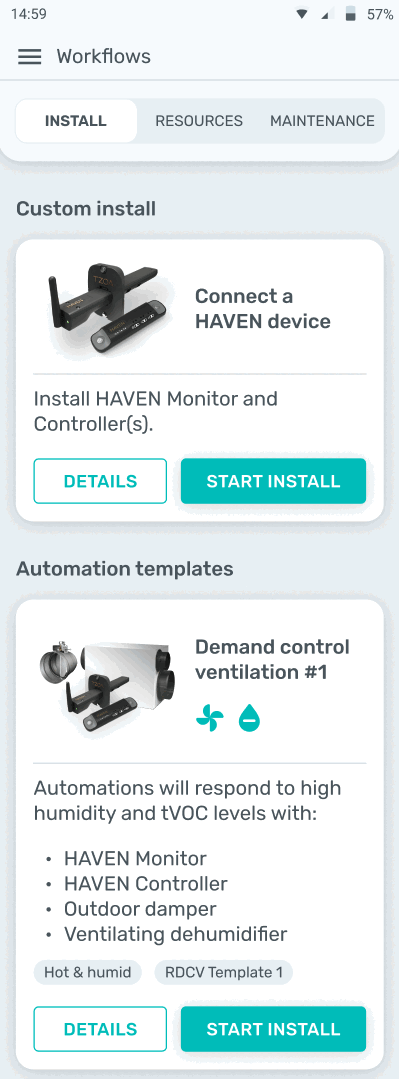
- Open the HAVEN IAQ App, navigate to the HAVEN Pro page (from the menu in the top left corner) and select your installation workflow. You can either start with a templated install or start from scratch with a custom install.
- Custom install includes cases where you are returning to a home to modify an existing HAVEN installation (e.g. adding a Controller, or modifying the equipment the Controller is connected to)
Setup
- Search for your customer by email.
- If an install already exists that's associated with this customer, you'll see the dwelling with populated zones.
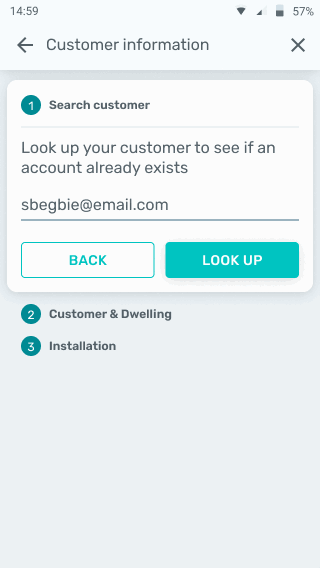
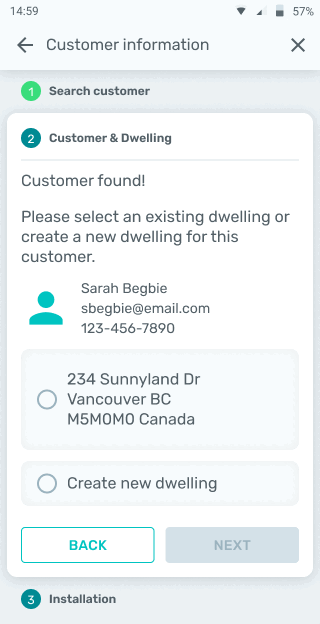
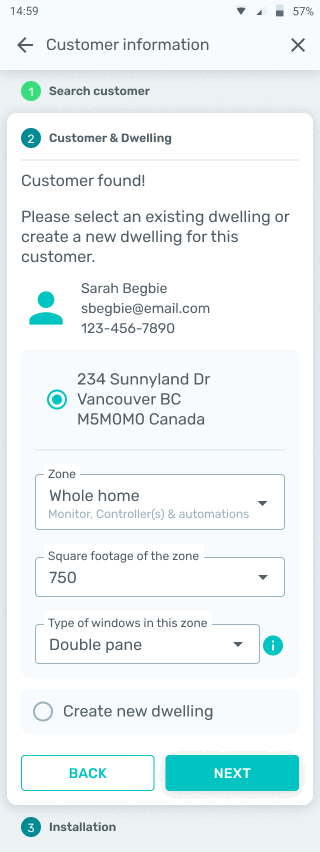
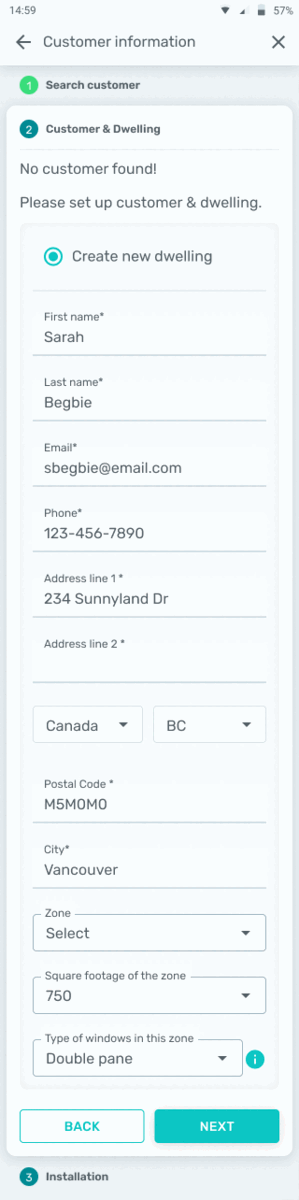
- If no install exists, fill in the required contact, address and zone setup fields. For the zone setup, make sure to enter in the WORST type of windows that are installed. This will be used for future comfort settings and if any de/humidification equipment is installed later.
- Choose your installation type, then find or add your customer & dwelling information.
- If your customer has an existing account, simply enter their email address and our system will find them.
- If they don't have an account yet, you can add their information manually.
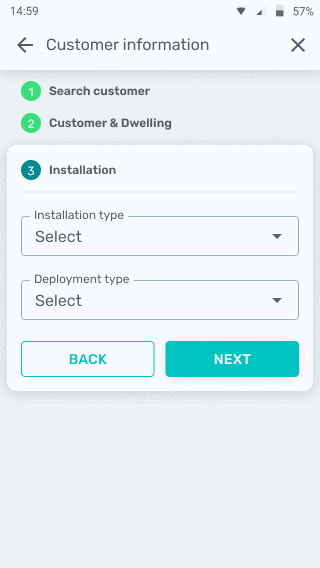
- Select the appropriate device and deployment type from the lists and continue by selecting next.
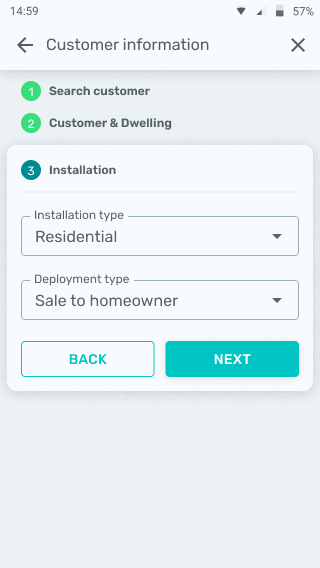
One-step equipment setup
Next, you will select which HAVEN devices you are installing and configure the HVAC and IAQ equipment they are associated with and wired to.
For full instructions, see this article.
Physical installation commissioning
Depending whether you are installing a Monitor or one or more Controller(s), HAVEN will prioritize the steps next to ensure they are PHYSICALLY installed properly.
*These steps MUST BE COMPLETED AT THE HOME.
For the Monitor, this includes:
- Ensuring the Monitor angle is positioned for a stable airflow signal
- Connecting the Monitor to WiFi & performing a cloud check
- Adding reference measurements for the relative humidity and temperature readings (optional)
For the Controller, this includes:
- Performing equipment activation tests
- Connecting the Controller to WiFi & performing a cloud check
Optimizing the Airflow Signal (for Monitor)
What's being measured?
The HAVEN Monitor is equipped with a proprietary sensor for airflow measurements, similar to a hot-wire anemometer.
Just like a hot-wire anemometer, this measurement accurately represents airflow at the probe’s current position, but it may not reflect the average airflow readings across the cross-section of this duct.
Why is this important?
The technician will be asked to test 3 slightly different installation angles for the probe in order to determine what the most stable airflow readings are. This is important for the particle (PM2.5) readings, as well as relative humidity and temperature.
Prep
- Select your mounting plate type.
- If you have the Original Mounting Plate, do NOT secure it to the duct yet.
- If you have the Rotating Mounting Plate, you can SECURE it to the duct. Then, unlock the rotating mechanism with the tab on the bottom.
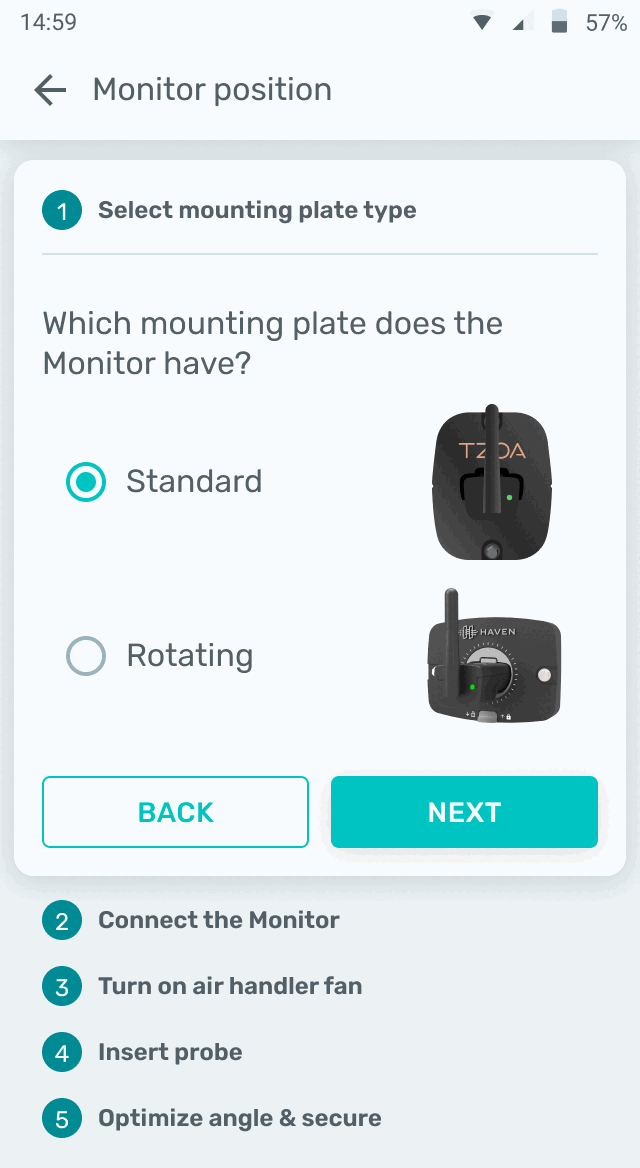
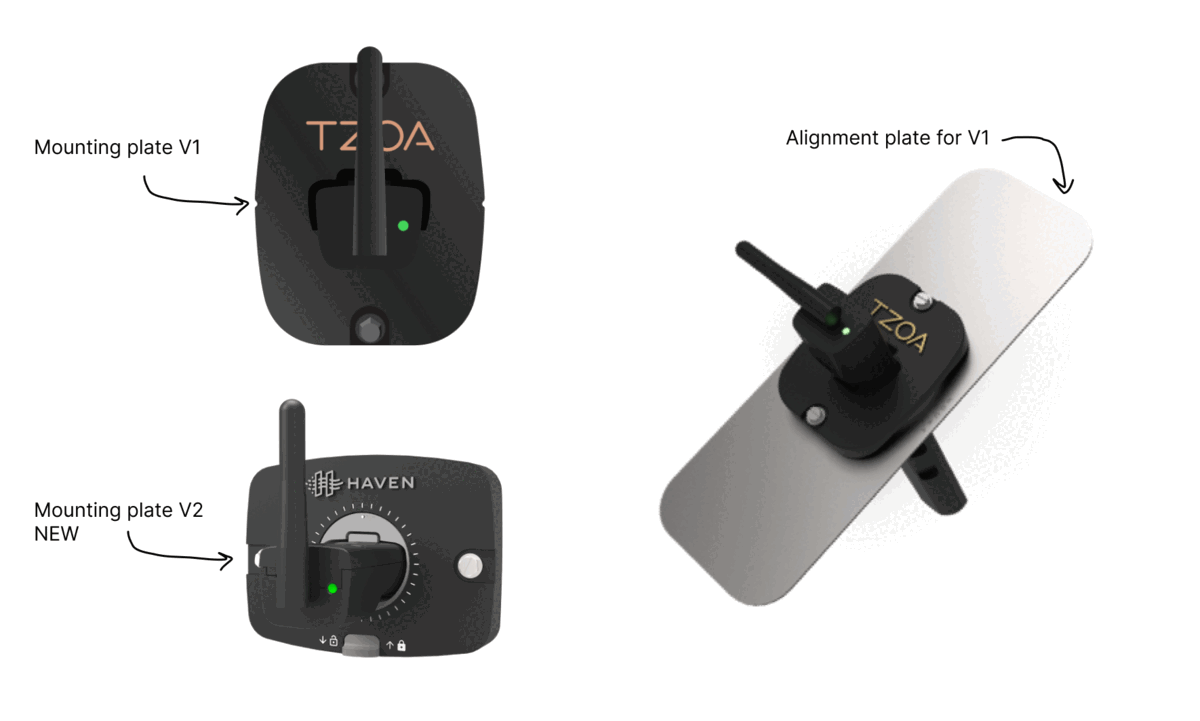
- Turn on Bluetooth on your mobile device so HAVEN IAQ App can connect to the HAVEN Central Air Monitor.
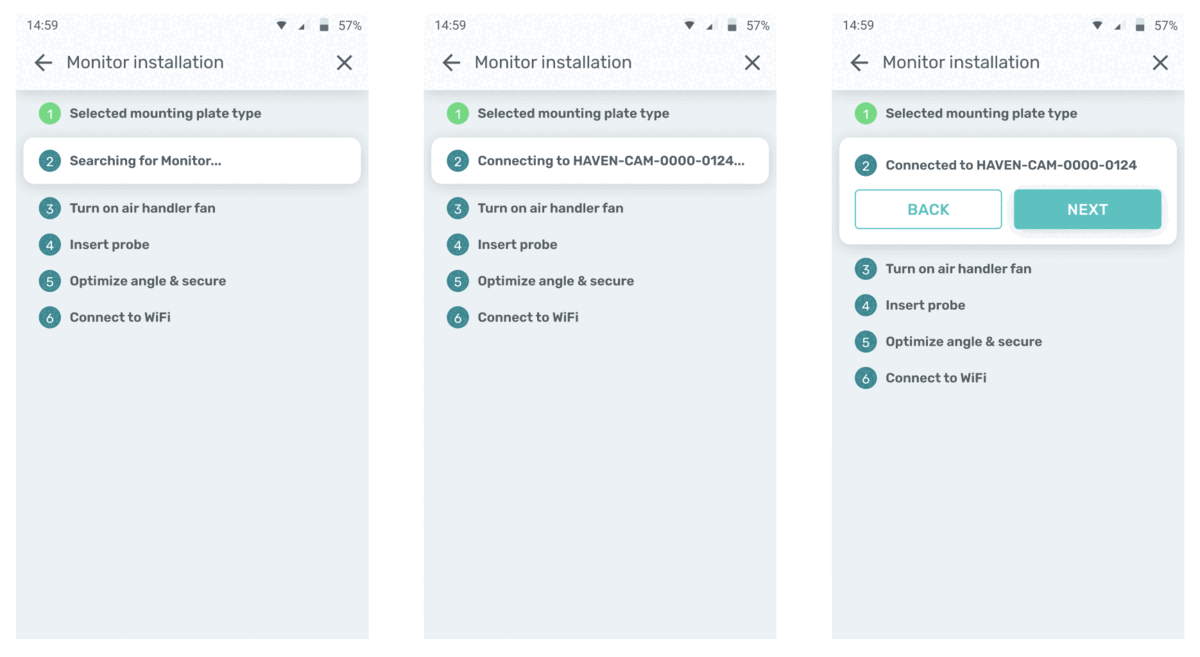
- If included, peel of the protective layer on the back of the alignment plate.
- Stick it onto the duct with the markings running parallel to the airflow.
- Turn on the air handler fan.
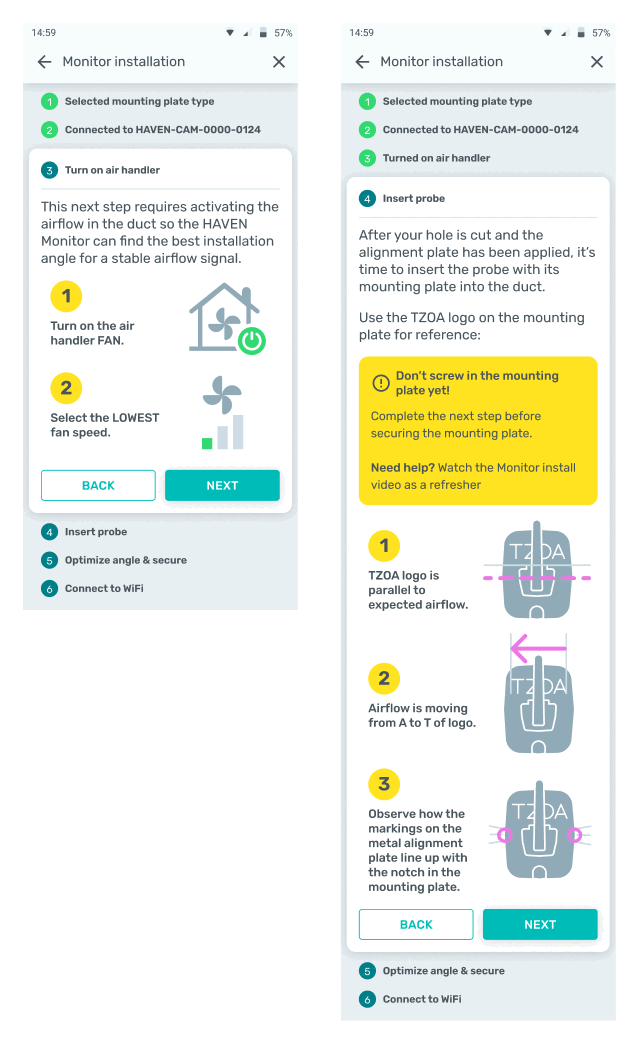
- Insert the probe into the plastic mounting plate and then align the notches on the left and right to the C position.
- The airflow direction should be from A to T of the TZOA logo.
- Do not secure the faceplate until the angle validation is complete!
Optimize angle & secure
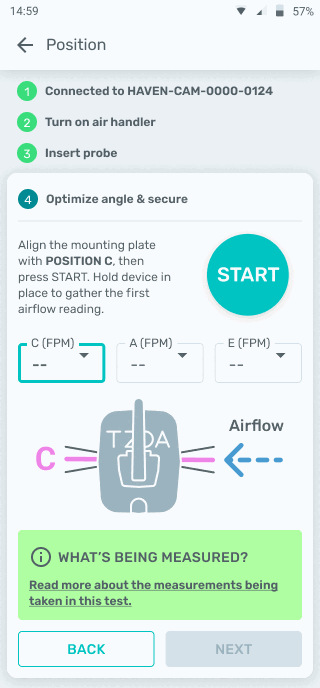
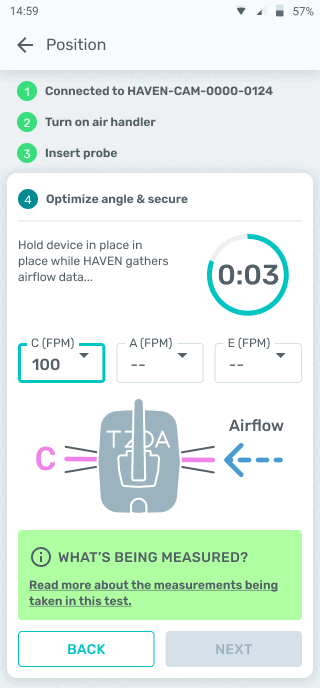
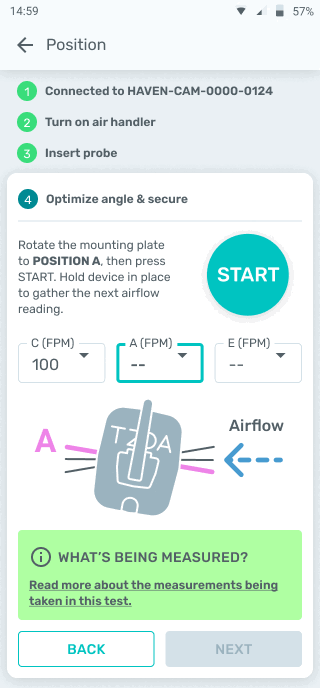
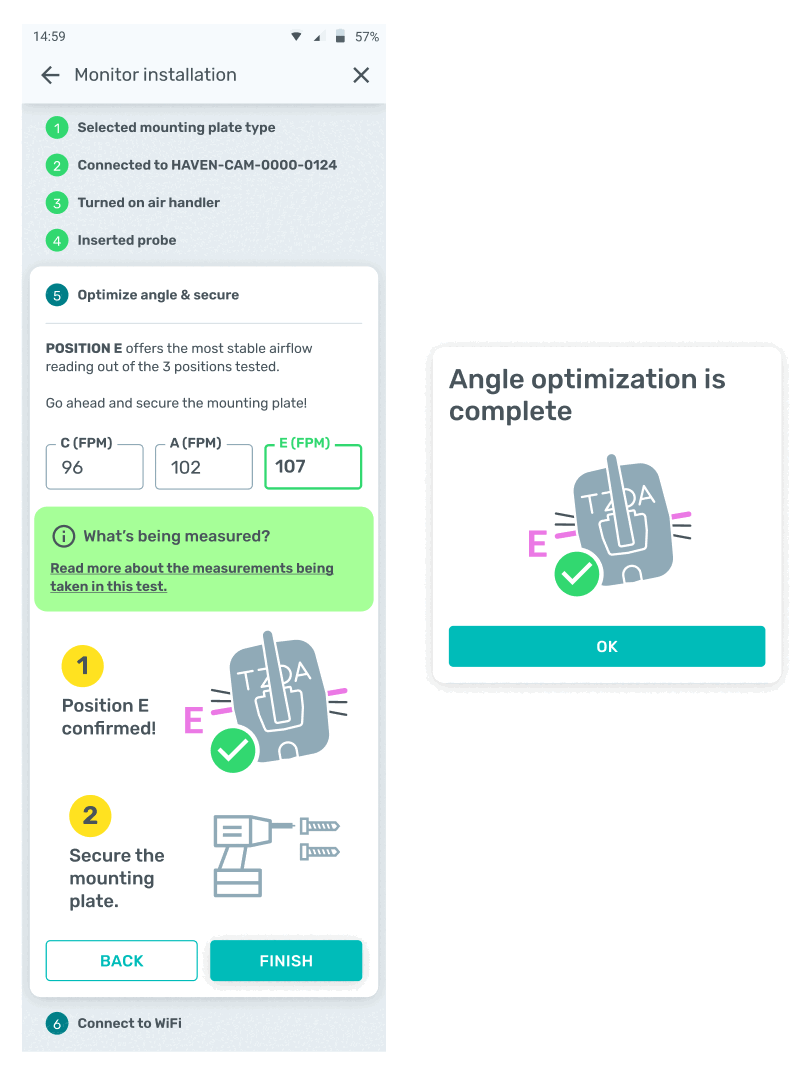
- The system will now test three positions to find the strongest and most reliable airflow.
- Select Start and the process will run a 10-second validation, hold the probe in place and repeat this step until the app confirms the final position.
Troubleshooting
- Low flow: If you cannot find 0.4 m/s or 80 fpm of airflow, consider moving the Monitor to an unobstructed position elsewhere on the return duct. Then redo the test.
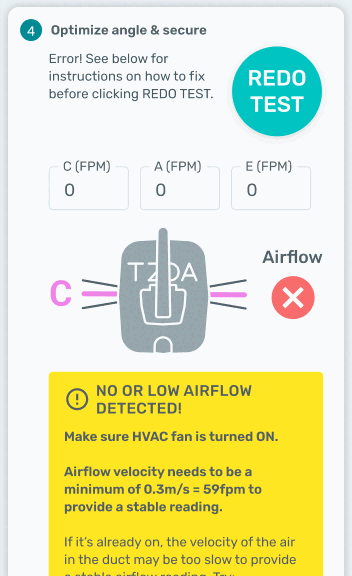
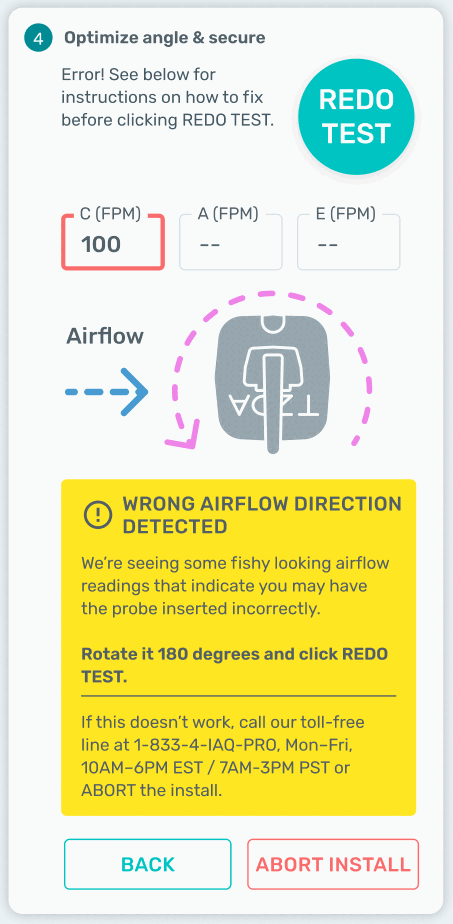
- Wrong airflow direction detected: The Monitor's sensors are configured a specific way. It should only be installed with the airflow moving from the A to T of the TZOA logo. This may require you to flip the Monitor 180 degrees. Then redo the test.
Secure the mounting plate with the self-drilling screws provided.
- Once you’ve validated the angle, you can secure the mounting plate with the screws provided (for the Original Mounting Plate).
- If you have the Rotating Mounting Plate, press up on the bottom tab to lock in position.
Connecting Monitor to WiFi
Connect to homeowner's WiFi & finish the installation.
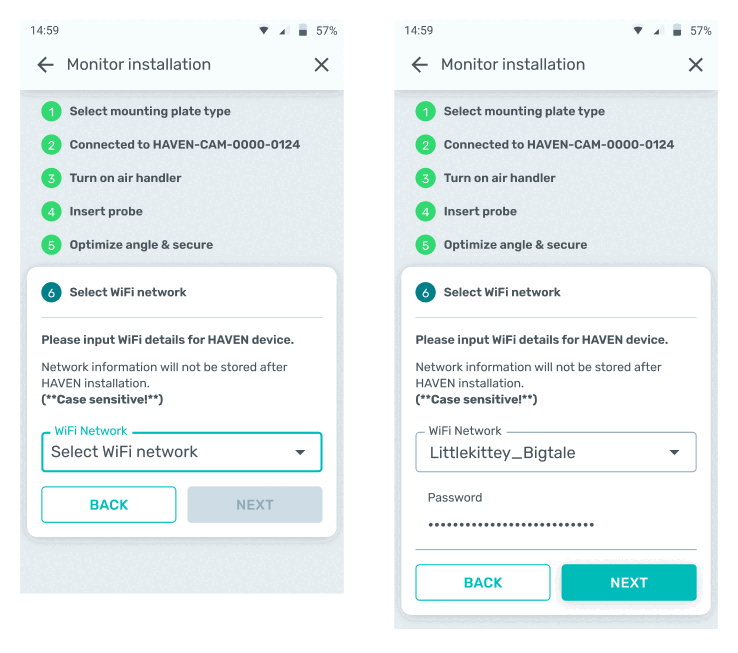
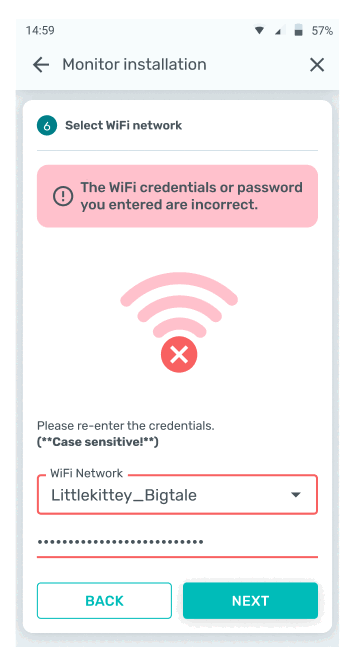
- Connect to the home’s WiFi network - your customer must supply the WiFi network name and password.
- Please note the name and password are both case-sensitive! - If there's a typo, the Monitor's LED will turn orange and you'll be directed to re-enter the WiFi details.
-
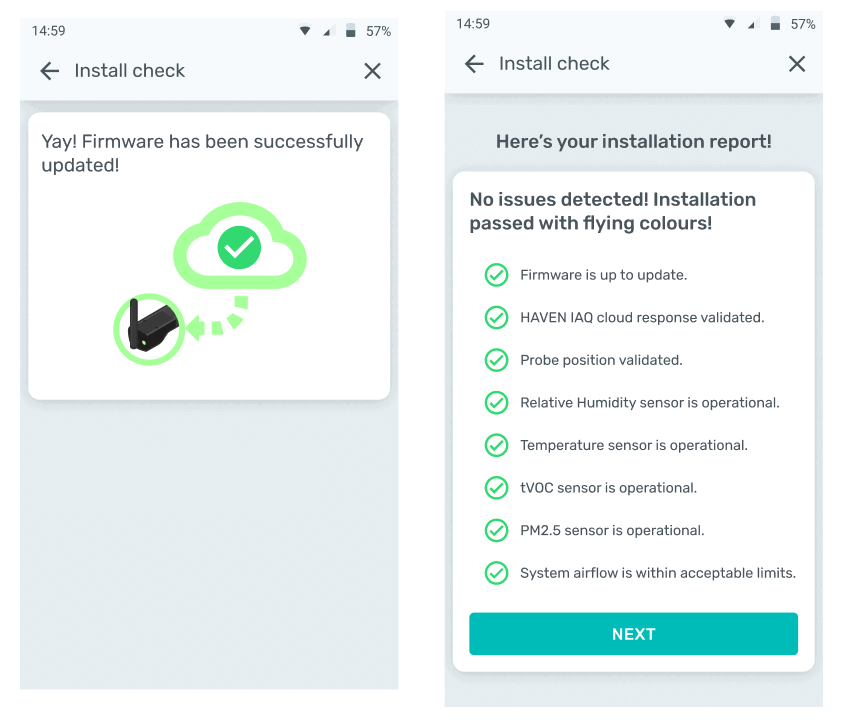
The air handler should be running during this next self check: Just before the installation is complete, our system will run a self-analysis on the Monitor, connectivity, and our suite of sensors.
- Cloud analysis
- Probe position
- Relative Humidity sensor
- Temperature sensor
- tVOC & PM2.5 sensors
- Confirmation of adequate system airflow
Installation Report Troubleshooting
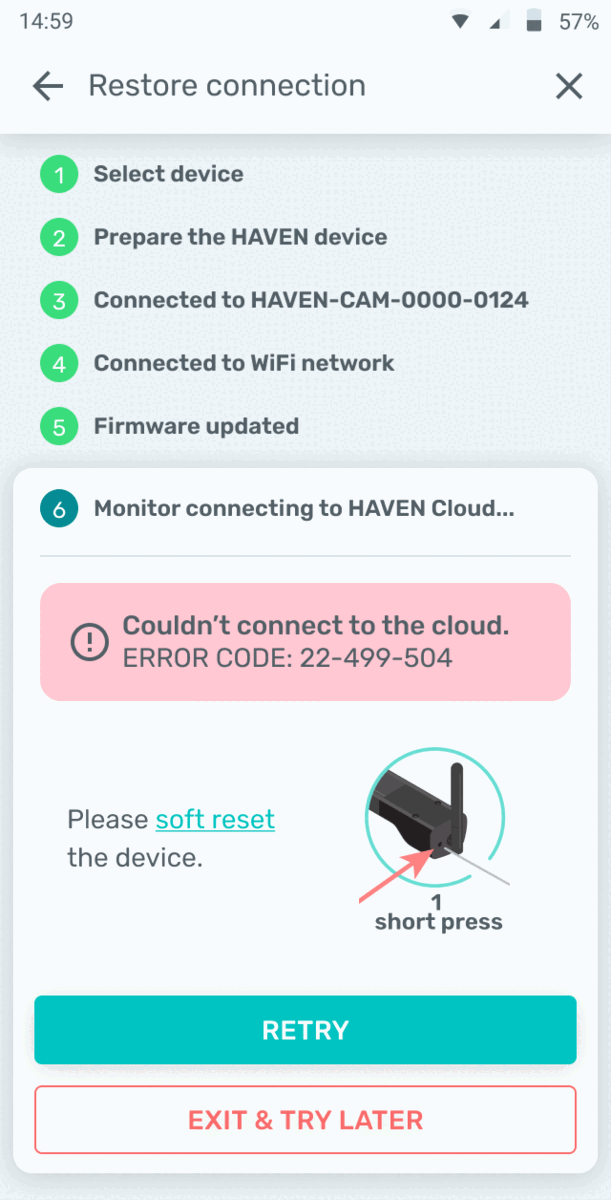
- If a cloud error occurs during the self check, this is likely due to the device being in the middle of an "over the air" (OTA) firmware update. This can be validated on the Monitor: the LED will be flashing green and aqua. All you need to do is perform a soft reset on the Monitor and then wait for the Monitor's LED to turn solid green with an aqua flash every minute. If it doesn't settle in this state in 1-2 minutes, perform a soft reset once more. This should do it.
- Click "RETRY" on the Installation Report page & the installation will complete.
Firmware Updates
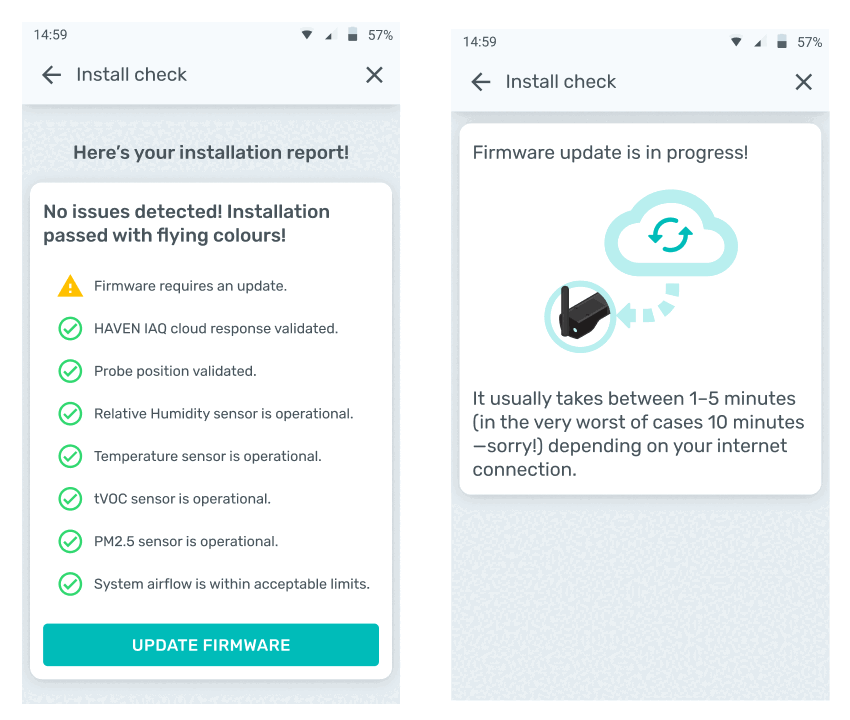
- It's possible the device may need a firmware update once it's connected to WiFi. This will be indicated by flashing green and blue lights on the Monitor's LED to the right of the antenna.
- This will usually begin automatically and then the app will need to redo the install check to make sure everything went as expected. Wait a minute for the lights to stop flashing and then click "Update firmware" or "Retry".
Adding Reference Measurements to Calibrate Relative Humidity & Temperature Readings (OPTIONAL)
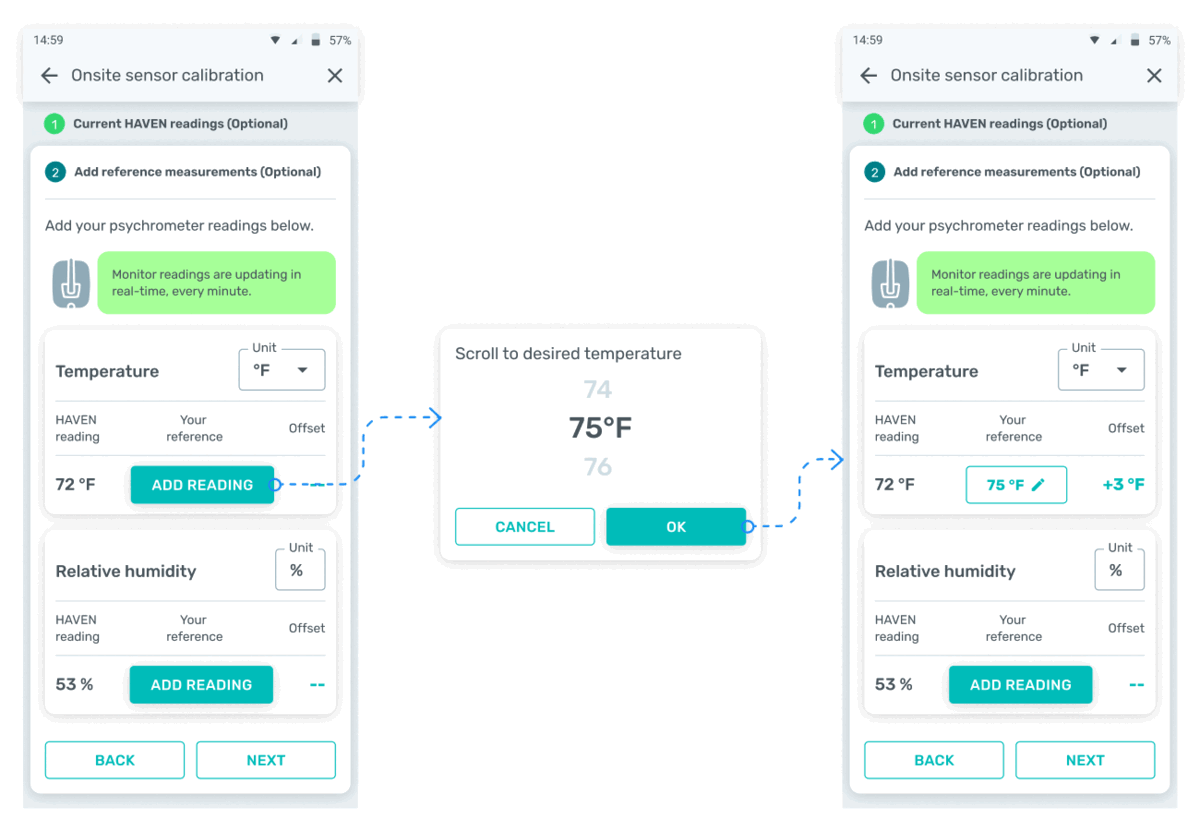
- In order to make sure the HAVEN Monitor is calibrated for reading RH and Temp in each specific climate zone, the technician can use their tool of choice to add reference readings. We suggest using an in-duct psychrometer instead of the thermostat readings, as thermostat readings will always likely vary substantially from what the in-duct readings are.
- It's important to keep the air handler running for this step.
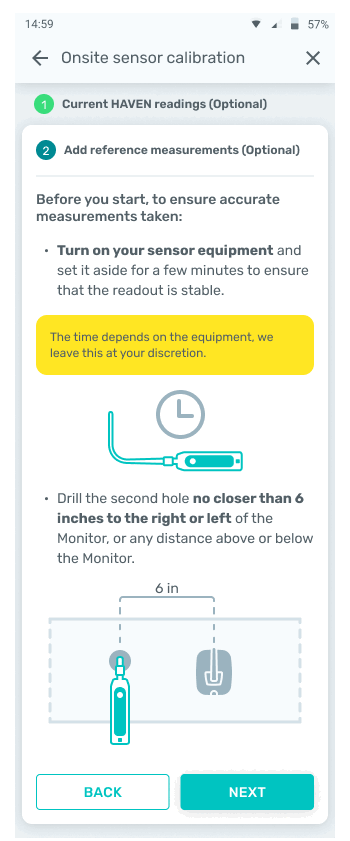
- Add what the exact READING is on your reference device. DO NOT input the difference between the HAVEN reading and your reference reading. HAVEN will do this automatically.
- If no calibration is needed, click "Next" to skip.
Ready to install your first Central Air Controller?
Related Articles
- Customizing your IAQ Controls with the Central Air Controller
-
Controlling Your Blower Motor with the HAVEN Central Air Controller